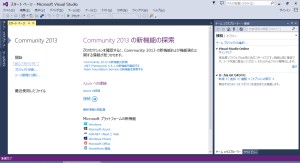
Visual Studio Community

インストール
Webインストーラー版
無料開発ツール - Visual Studio Community
オフライン版
ISO版
Visual Studio 2017以降はISO版は用意されておらず、必要なファイルをローカルにダウンロードした上で、それを用いてインストールします。Use the command line to create a local cache - Create an offline installation - Visual Studio | Microsoft Learn
オフラインでインストールするには、ISO版をダウンロードします。それはダウンロード | Visual Studioのページの、下図のリンクから入手できます。

ローカル レイアウト (local layout) によるインストール
- Visual Studio ブートストラップ (Visual Studio bootstrapper) をダウンロードする
- 管理者権限でコマンドプロンプトを起動し、パッケージをダウンロードする
vs_community.exe
 --layout c:\vslayout
 --add Microsoft.VisualStudio.Workload.ManagedDesktop
 --add Microsoft.VisualStudio.Workload.NativeDesktop
 --includeRecommended
 --includeOptional
 --lang en-US Ja-jp
インストールするコンポーネントを指定するComponent IDは、Visual Studio Community workload and component IDsに一覧があります。
Component ID Visual Studio core editor (Visual Studio のコア エディター) (included with Visual Studio Community 2022)
Microsoft.VisualStudio.Workload.CoreEditor .NET desktop development (.NET デスクトップ開発) Microsoft.VisualStudio.Workload.ManagedDesktop Desktop development with C++ (C++ によるデスクトップ開発) Microsoft.VisualStudio.Workload.NativeDesktop - vs_Community.exeまたはvs_setup.exeを実行し、ダウンロードしたパッケージからインストールする。(vs_Community.exeとvs_setup.exeは同一のバイナリ)
起動
起動時にはサインインを求められますが、それは30日の評価期間の制限を解除するために必要です。Visual Studio へのサインイン | MSDN
日本語化
Visual Studio Communityのダウンロードページから言語パックをダウンロードし、インストールします。これのインストールには時間がかかる場合があるため、ハングアップしているように見えても待ちます。そのとき「Microsoft Visual Studioで、インストールされている言語リソースのバージョンの不一致が検出されました。…」と警告されることがありますが、これは無視しても問題ないようです。
言語パックをインストールしたら、メニューの【TOOLS → Options】の[Environment → International Settings]から言語を選択し、Visual Studioを再起動します。
更新
更新は管理者権限で行いますが、そのままVisual Studioを起動すると管理者として実行されてしまいます。よってVisual Studioの更新後には、アカウントを戻してから起動します。
参考
- Visual Studio Community 2013 - Visual Studio
- Installing Visual Studio Versions Side-by-Side | MSDN
複数バージョンのVisual Studioの共存